
 As I pack, plan, and prepare for my upcoming marathon AKA the London Marathon, I’ve been reading quotes to help me get amped up and excited.
Continue reading Run Inspired!

As I pack, plan, and prepare for my upcoming marathon AKA the London Marathon, I’ve been reading quotes to help me get amped up and excited.
Continue reading Run Inspired!
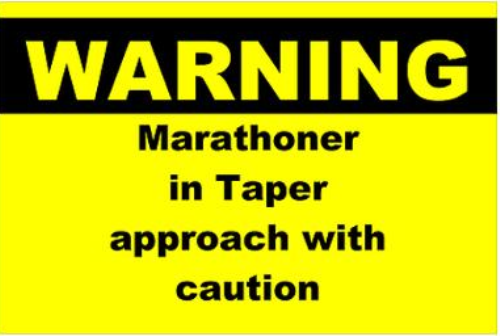 As I prepare for the London Marathon next week (4/24/15), I have begun the tapering process. I kinda have a love/hate relationship with tapering. I know it’s important but being someone who works out several hours a day and runs up to 64 miles a week, the taper can be tough. I am use to moving a lot, so when I actually have to take a pause, cut back, or stop… it can be hard.
Continue reading Stop! Taper Time!
Over the last year, I have been working on getting comfortable with being uncomfortable when I run, so that I can get stronger & faster. In the past, I’d often settle into what I considered to be a nice easy pace. Everytime I tried to go a little faster, my breath shortened or I experienced some muscles soreness, so I backed off.
But, when I started having time goals for my races, I knew I had to begin pushing through some of that discomfort in order to grow and make progress. Over the last year, I was able to shave 23 minutes off my marathon time and that feeling was incredible. If I never pushed myself through some of that discomfort, I may have never known what I was truly capable of.
Pushing through some level of pain when running is pretty much unavoidable if you want to improve your endurance fitness. The Overload Principle is an important fitness concept which basically says, in order to improve your fitness (endurance and/or strength), you need to work harder as your body adjusts to workouts. With running this means either by increasing the speed at which you run or the distance.
Your brain sometimes associates pain with injury, but that’s not necessarily the case. When we think about pain, there are a couple types of pain we need to consider. There is the pain associated with an intense physical effort such as fatigue, muscle burning and joint aches or there is pain associated with an injury. Being able to decipher the difference between the two is important.
Getting to know your body and understanding the signals it’s sending you can take time, but here are some tips to helping you reach inside yourself and find that toughness to keep pushing on.
First, change the way you handle pain. If you increase the demands of your training over time, you will better understand your body’s messages and learn to develop more efficient coping strategies to dealing with the pain. You will learn to recognize it and work to push past it. For example, elite athletes train for hours a day. They put themselves through more pain in a week than most of us endure in a year. But they acknowledge it and work through it knowing it won’t last forever. That’s how they get to the next level.
So here is what you can do when you feel certain pain and when you need to stop.
Pain coping strategies I use when feeling fatigued, a little sore, etc..
If you feel the following pain, you should stop:
My good friend Catherine is getting married this summer and asked me about some great arm exercises she could do at home to help her arms be “wedding dress ready”; so this week’s post is dedicated to her!
Catherine- I think you and your arms already look sculpted and beautiful but I understand why you want to get more definition. I hope the following exercises will help 😉
Now is a great time to begin sculpting the lean muscles that are crucial for giving your upper body shape. Just know, that it can take approximately six weeks to see results from any strength-training exercise or program. So let’s get started….
To begin, here is what you need to do:
Grab a set of weights or if you don’t have weights, you can use water bottles. Or, you can even fill empty bottles up with coins (or other materials) to make your own weights.
These movements can be done right from the comfort of your home. In fact, the videos below were taken right outside my house! Click on the titles to view the videos!
Do 1-3 sets of 5-10 reps for each movement below (depending on your fitness level). As you get stronger, you can add more weight, more reps and even another set. For best results, try to do these exercises 3-4 times a week. You can break the movements up too, maybe do the first 5 one day and the next 5 another day.
Have fun!
Stand with a weight in each hand, arms by your sides, and palms facing forward. Bending your elbows, raise the weights to your shoulders, then lower and repeat.
Sit on a sturdy chair. Supporting yourself with your hands on the seat, slide your legs forward until your butt is off the chair. Bend your elbows, and lower your butt towards the floor. Your arms should be at about 90 degrees, next, straighten your arms and repeat. To modify keep your legs bent or for an added degree of difficulty you can elevate your feet.
Option 1- Begin bent over with your chest parallel to the ground & with a flat back. Stand with a weight in each hand, arms bent at shoulder height, keep arms by your side and bent at 90 degrees. Next, extend your arms straight behind you and then rebend. Option 2. Wrap both hands around 1 weight. Bring your hands up overhead and bend your elbows so the weight falls behind your head, straighten your arms and repeat.
Start in a standing position, a weight in each hand, palms facing legs. Raise your arms directly out to the sides, forming a “T”, then lower them back by your sides, repeat.
Start in a standing position, a weight in each hand, palms facing backward. Raise your arms directly in front of you until they are parallel to the floor, then lower them, repeat.
Begin in a full plank position with feet hip-width apart. Lightly tap left shoulder with right hand. Return to start and then immediately lift left hand and tap right shoulder. That’s one rep, repeat.
Start in a straight-arm side plank, your body forming a straight line from head to feet. With a weight in your free hand, lift your arm to the ceiling, then lower it to your side. Switch sides and repeat. To modify, drop your knee.
Begin in a push-up position with hands in a wide diamond (fingers pointing toward each other). Walk your toes in and lift your hips until your body forms an upside-down “V”. Bend elbows to lower head toward hands, press back up.
Get into plank and put your right hand on a ball (medicine ball, soccer ball, basket ball, you can even use a stack of books if you don’t have a ball) and keep your left hand on the floor. Squeeze your abs and shoulders as you lower towards the floor, keeping elbows in. Push back up and pass the ball to the other side, repeat.