Each Holiday throughout the year, I teach a special class that revolves around plank pose (Kumbhakasana). I love anything that involves core work and plank is just one of the many exercises that I enjoy most and love to teach. So in honor of Thanksgiving, I held my annual Happy Planksgiving Flow.
Why I love planks: Plank pose tones all of the core muscles of the body, including the abdomen, chest, postural muscles of the spine, and low back. It strengthens the arms, wrists, and shoulders, and is often used to prepare the body for more challenging arm balances. Additionally, strengthening the muscles along the spine help us to improve our posture, continues to build and strengthen our foundation, and keep us aligned, strong, and stable.
Practicing plank pose for several minutes builds endurance and stamina, increases strength, helps tone your muscles, all while contributing to central nervous system adaptations. So let’s get planking!!!
Below are some of the plank variations you could anticipate in any of my plank flows/classes!
- High Plank:
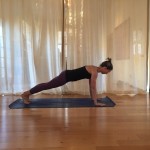 When it comes to planks, form is everything. Paying close attention to form not only ensures you’ll get a great workout, but also that you’re protecting your body from injury. Start in tabletop position, place your hands directly under your shoulders. Lift your knees until you are supporting your weight on just your toes and hands. Spread your fingers, making a wide, stable base. Shoulders should be over your hands and heels over toes. Hold your body in a straight line from the crown of your head down to your heels. Hold your core in tight, being careful not to let your stomach sag or let your back round.
 - Rocking Plank: VIDEO EXAMPLE From a basic plank, rock forward on your toes until your shoulders move past your hands. Then push your shoulders backward until your heels extend beyond your toes. Move in a slow controlled manner to challenge your balance, coordination, and shoulder strength.
- Plank With Shoulder Touches: VIDEO EXAMPLE From a standard plank position, reach your right hand to touch your left shoulder. Put it back down and repeat with your left hand tapping your right shoulder. Keep the focus on a tight and stable core.
- Side Plank:
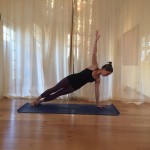 Starting in standard plank position, bring your legs together until your heels touch. Rotate your body onto one hand and stack your feet, lift your other hand up towards the ceiling.
 - Forearm Plank:
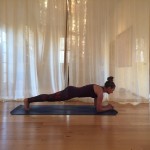 Starting from standard plank position, lower yourself until you’re resting on your forearms. Keep forearms parallel to each other with hands flat on the ground or interlaced together.
 - Reverse Plank:
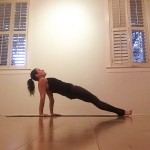
Sit on the ground with your legs extended in front of you and arms at your sides. Place hands on the floor next to your hips, fingers pointing towards your feet. Lift your hips as high as you can, aiming for a straight line from chin to toes. - Walking Plank: VIDEO EXAMPLE Take your plank on the move by adding an up-and-down motion. Assume standard plank position on hands and toes. Slowly lower right forearm down then bring your left forearm down. Then moving with control, press back up into plank one hand at a time. Repeat as many times as you’d like 😉
- Single arm plank:
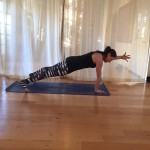 Test your balance and your strength! Start in standard plank position. Slowly lift your left arm, extending it out in front of you. Keep your back flat (resist the urge to tilt your hips to the right). You can widen your feet to help with your balance. Switch sides.
 - Single-Leg Plank:
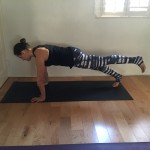 Start in standard plank position. Lift one leg up behind you, keeping your body flat and both the extended and supporting legs straight. Switch sides. (Maybe try lifting one arm and one leg!)
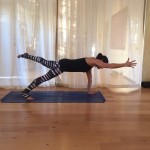
- Side Plank Crunches: Begin in a side plank. Push into the floor with your bottom foot and lift your top leg. Bend your knee and bring it in to touch your top elbow. Try not to lean forward or backward. Maybe try 5-10 taps per side.

